1) Define the Night Experience First (Function + Mood)
2) Use Lighting Techniques to Create Depth (Not Just Brightness)
3) Control Glare and Color for a Comfortable, Premium Look
4) Plan Zones, Controls, and Sustainability Like a Pro
FAQs
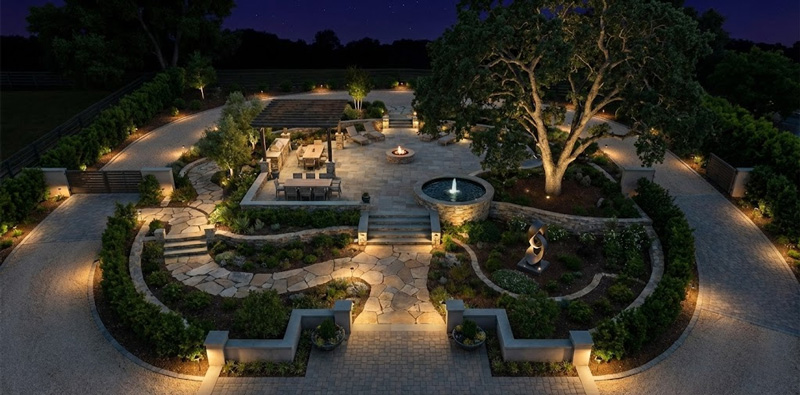
Landscape lighting is not about making your yard “bright.” It’s about shaping what people notice after dark—guiding movement, creating comfort, and revealing texture and depth while keeping the night calm. A high-quality lighting plan makes outdoor spaces feel intentional and elegant, not overlit. Below is a long-form guide with only four point-style sections (each section is a major “pillar”), so it stays structured without becoming a checklist.
1) Define the Night Experience First (Function + Mood)
Before selecting any fixtures, decide what the lighting must do and how it should feel. Most landscapes need a blend of safety, usability, and beauty—but the priority changes depending on the space.
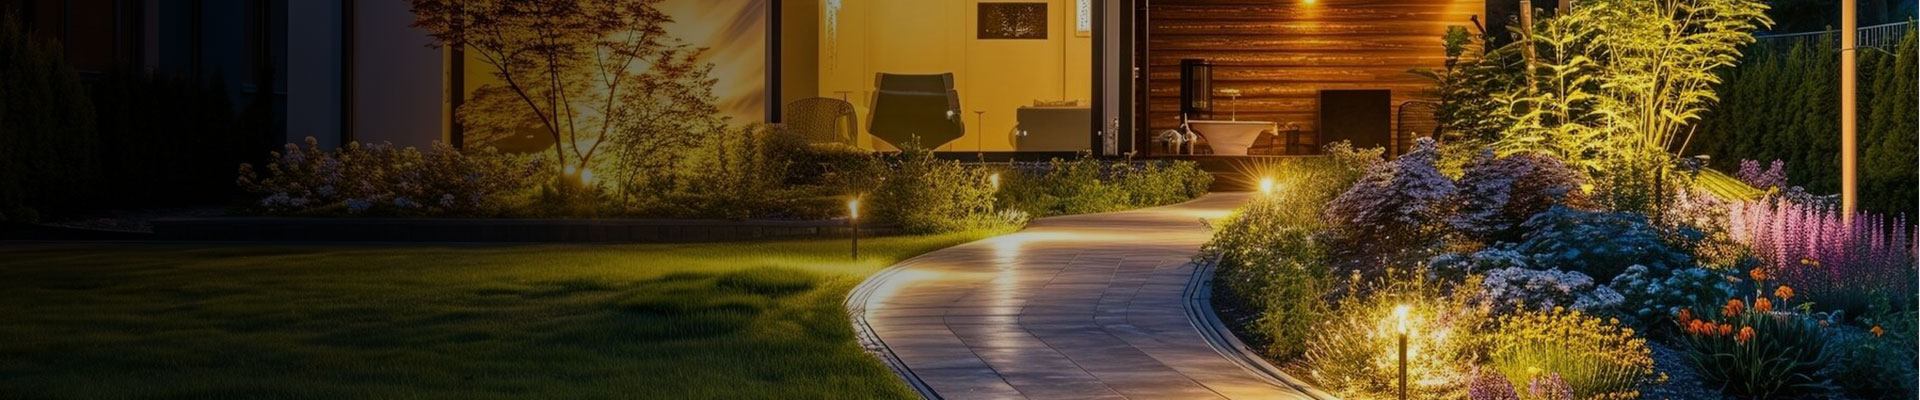
Start with two questions: Where do people move? and Where do they pause? Movement zones include entrances, driveways, steps, and paths. Pause zones include patios, seating nooks, outdoor kitchens, and viewpoints from inside the house. Your design should support both. When movement zones are legible and pause zones are comfortable, the entire property becomes easier to enjoy at night.
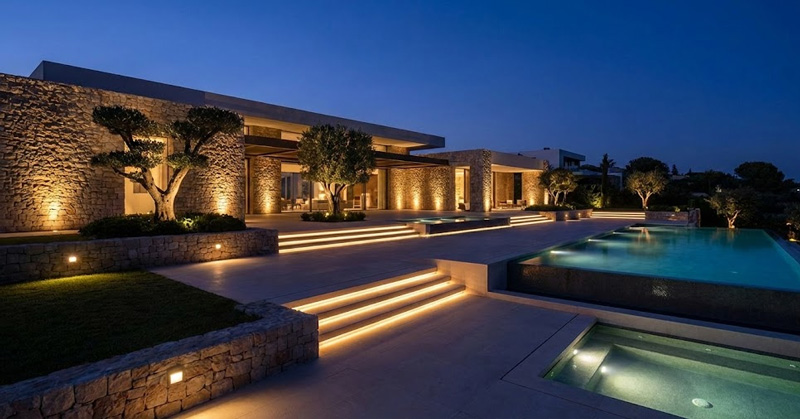
Now add mood. Some landscapes want a “boutique hotel courtyard” feel—soft, warm, and intimate. Others suit a modern “architectural gallery” look with crisp lines and stronger contrast. Whatever your style, keep one guiding principle: night lighting should feel calmer than day. If everything is equally bright, your eye has nowhere to rest, and the yard can feel harsh. Darkness is not a failure; it’s part of the design.
A practical way to keep the mood consistent is to design a visual hierarchy:
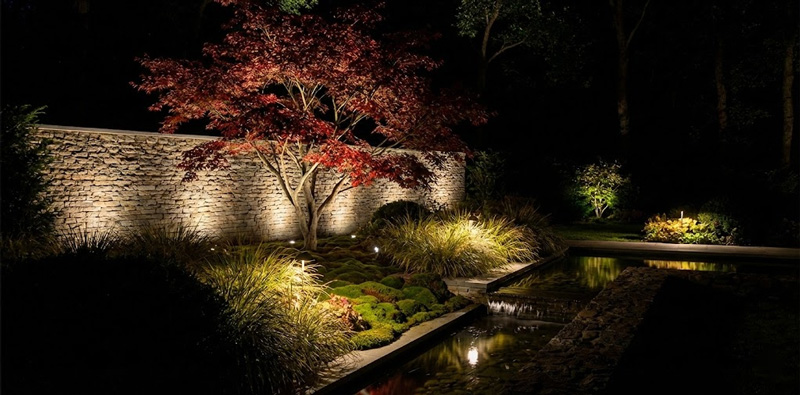
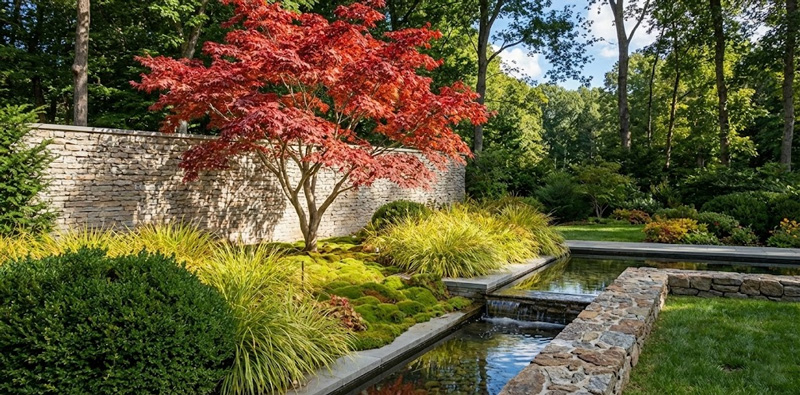
- Choose 1–3 “hero” features visible from key views (a specimen tree, a textured stone wall, a water element, a sculptural plant cluster).
- Support them with secondary accents.
- Leave some areas intentionally dim to preserve contrast and mystery.
This hierarchy is what separates a professional nightscape from a yard that looks simply “lit.”
2) Use Lighting Techniques to Create Depth (Not Just Brightness)
Once you know what you want to highlight, choose techniques that sculpt the space. Think of light like a brush: different strokes produce different atmospheres. Rather than mixing dozens of effects, use a few techniques well and repeat them with restraint for a cohesive result.
Uplighting
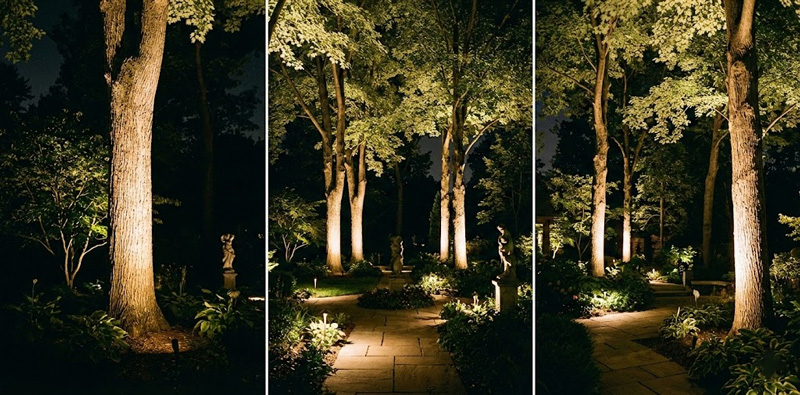
Uplighting creates drama and vertical presence. A tree trunk becomes a column; a canopy becomes a ceiling. It’s powerful, but easy to overdo—too bright and it looks theatrical or glaring. The key is choosing the right beam spread and aiming so the light reveals form without blasting the viewer.
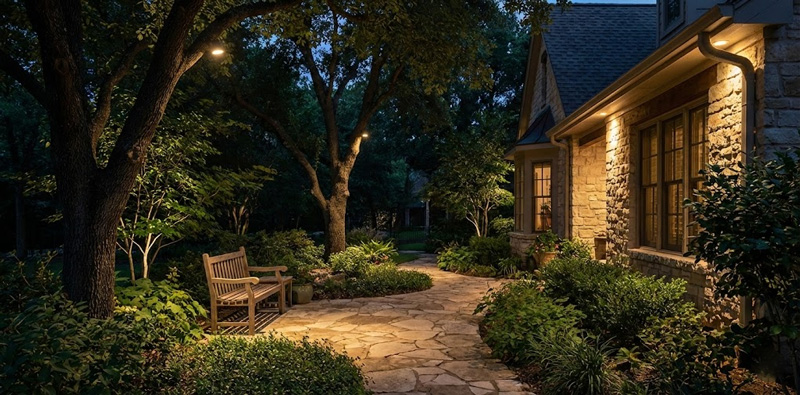
Downlighting / Moonlighting
Downlighting / “moonlighting” is often the most natural-looking method. Light placed higher up (in a tree or on an eave) falls in soft pools, making paths and seating areas comfortable while hiding the source. It also avoids the runway effect caused by overly bright or frequent path lights.
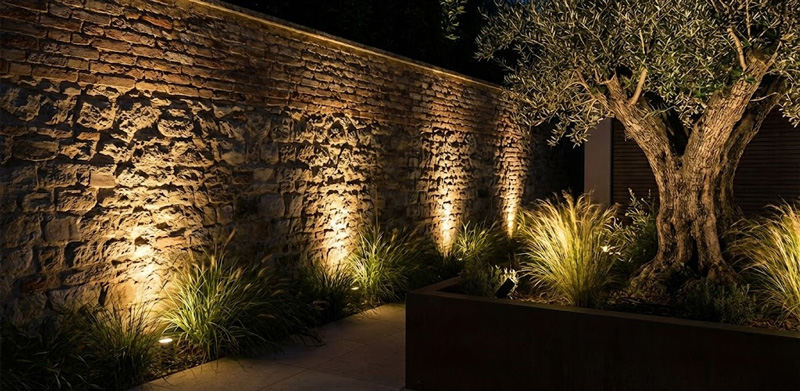
Grazing
Grazing makes textures look luxurious. When light skims across stone, brick, or bark, shadows reveal depth and detail. Small changes in distance and angle matter a lot, so testing at night is worthwhile.
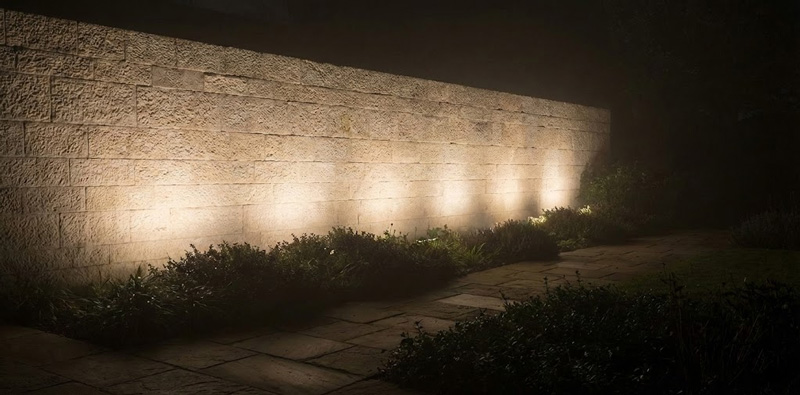
Washing
Washing is a softer, more even approach—ideal for hedges, fences, or walls when you want a calm background rather than a dramatic texture effect.
The best designs combine techniques to create layers: a soft base of downlight, one or two bold uplight statements, and selective grazing for texture. This layered approach gives the property dimension instead of a single “brightness level.”
3) Control Glare and Color for a Comfortable, Premium Look
Glare is the fastest way to make a landscape feel cheap or uncomfortable. If people can see intense points of light, they squint, lose night vision, and feel less relaxed—even if the yard is technically “well-lit.” High-end lighting is often less bright than people expect, because it’s controlled and placed intelligently.
To reduce glare:
- Keep light sources hidden from common viewing angles (from patios, front doors, and interior windows).
- Use shielding accessories when needed (shrouds, louvers, glare guards).
- Aim beams away from eye level and across surfaces rather than directly outward.
- Let reflected light do more work than direct light.
Color quality matters just as much as glare control. Many landscapes look best with warm light because it flatters stone, wood, and plant life and feels calm at night. Cool light can look stark and “security-like,” especially on foliage. If you choose a warm tone, keep it consistent across the property so the scene feels unified rather than patchy.
Also pay attention to how accurately colors render. When color quality is poor, plants can look gray or lifeless and materials can shift into unpleasant tones. Good color quality makes greens look natural and textures look richer—subtle, but it’s one of the main differences between a mediocre install and a truly beautiful one.
Finally, remember that shadows are part of comfort. A yard with no shadows often looks flat. A yard with controlled shadows looks spacious and inviting.
4) Plan Zones, Controls, and Sustainability Like a Pro
Even a gorgeous layout can disappoint if the electrical and control plan is an afterthought. Good landscape lighting feels effortless because it’s organized behind the scenes.
Create zones that match how you use the space:
- Entry and front façade
- Pathways and steps
- Patio and dining
- Feature elements (trees, sculpture, water)
- Perimeter or driveway (if needed)
Zoning lets you set different scenes: a gentle everyday setting, a brighter entertaining mode, and a late-night dimmed mode. This is where lighting becomes lifestyle-friendly rather than “on/off.”
Controls matter for both aesthetics and responsibility. Dimming and scheduling prevent the yard from being unnecessarily bright at midnight. Motion-triggered boosts can be more effective than leaving everything bright all night, especially for side yards or driveways. A thoughtful plan saves energy, reduces light spill to neighbors, and is kinder to wildlife—while still making the property feel safe and polished.
Also plan for maintenance and growth. Plants mature; trees fill in; viewpoints change. Use fixtures and placements that allow adjustment over time, and keep key components accessible. A landscape lighting system is not “set forever”—it’s a living design that evolves with the garden.
FAQs
What is “layered lighting” in landscape design, and why is it important?
Layered lighting combines different roles of light—such as ambient or base lighting, task lighting, accent lighting, and moonlighting—to create depth and visual hierarchy.
This approach avoids a flat, evenly bright appearance and helps guide the eye naturally through the space.
Well-layered lighting improves comfort, usability, and overall aesthetics by giving each area a clear visual purpose.
How do I decide between uplighting and moonlighting for trees?
Use uplighting when you want drama and strong vertical emphasis, particularly for textured trunks or sculptural tree forms.
Moonlighting, or downlighting, creates a more natural and comfortable effect for paths and seating areas because the light source is typically hidden and glare is minimized.
High-end designs often use both techniques together, but with restraint and a clear hierarchy to avoid visual clutter.
What causes glare in landscape lighting, and how can I reduce it without losing brightness?
Glare is usually caused by exposed light sources and poor aiming, especially when fixtures shine directly into sightlines from patios, entryways, or interior windows.
Reduce glare by hiding fixtures from common viewpoints, using shields or louvers, and aiming beams away from eye level.
Relying more on reflected light off surfaces rather than direct light into open space preserves brightness while improving visual comfort.
What’s the practical difference between grazing and washing a surface?
Grazing places the light source close to a textured surface so the beam skims across it.
This creates shadows that emphasize depth and texture, making it ideal for stone, brick, bark, or other rough materials.
Washing spreads light more evenly across a surface, creating a soft background plane that works well for hedges, fences, or walls where a calmer look is desired.
How should I structure lighting zones and controls for different nighttime scenarios?
Divide the system into zones based on use: entry and façade, pathways and steps, patio or dining areas, and feature elements.
Use dimming and scheduling to create scenes such as everyday soft lighting, brighter entertaining modes, and late-night reduced levels.
For low-use areas, motion-activated boosts are often more efficient than keeping higher output lighting on all night.